- Customer Service
- Our Universe
MASTER
CONQUEST
SPIRIT
ELEGANCE
HERITAGE
- Men's Watches
- Women's Watches
- All Watches
Find my Longines
Style
Color
Function
Accessories
Dear Partners,
This guideline will support you in your first steps with RIS.
Good to know about RIS
It is a web application allowing you to manage different things such as:
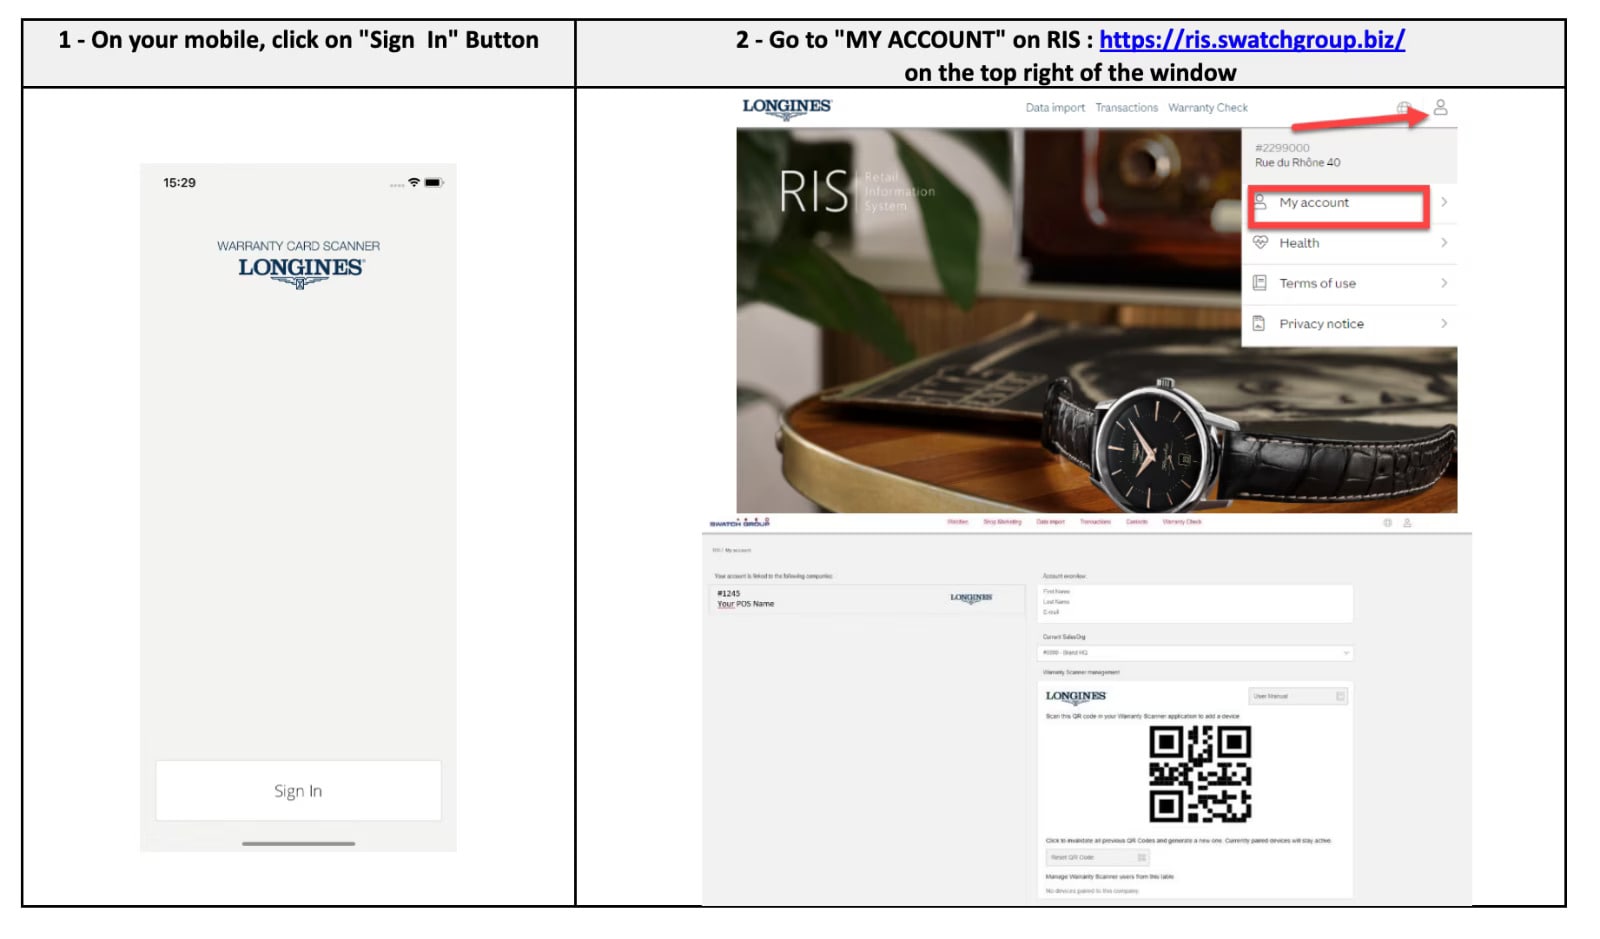
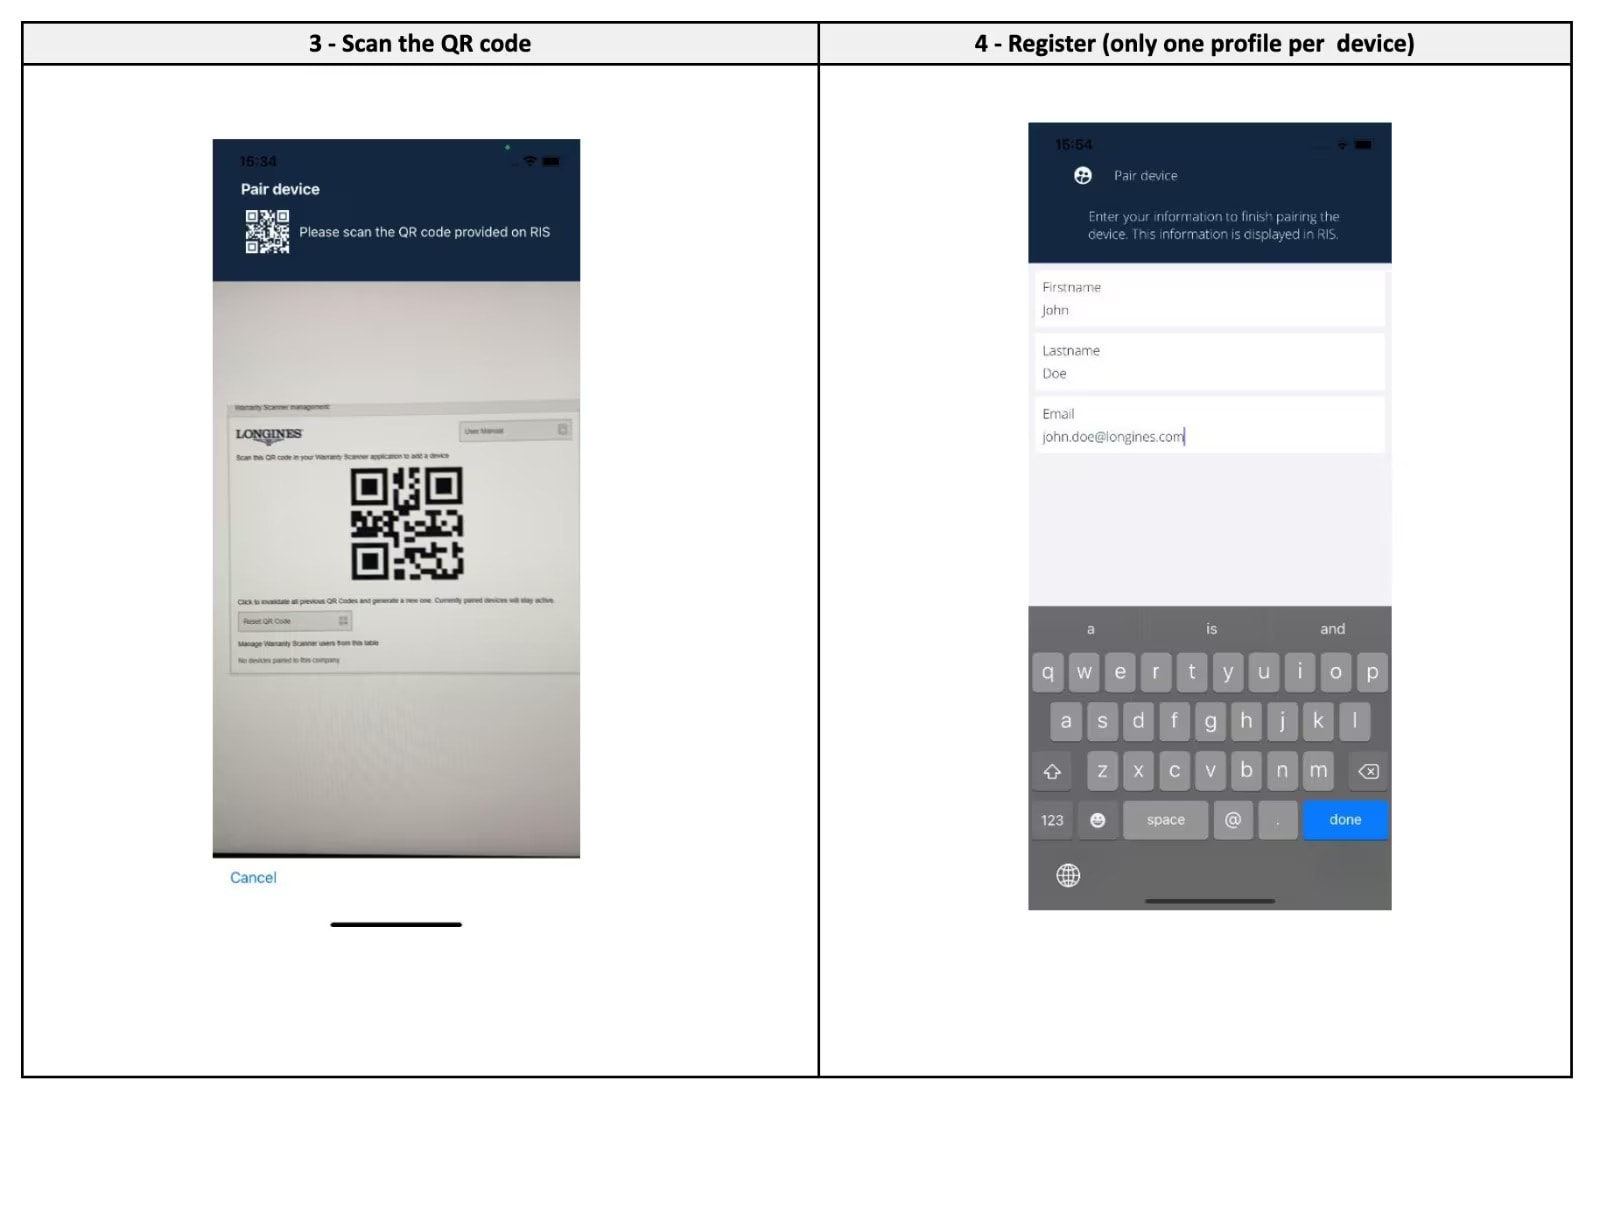
- Find your unique QR code to be used when you pair your smartphones/tablets with the "LONGINES Warranty App" (note that if you have more than one store, they all can be added in your RIS account and you will have one QR code per store)
- From RIS, you have the possibility to activate the warranty of the watches but we strongly recommend using the "LONGINES Warranty App" to do so. This alternative through RIS is a "back-up" solution if for any reason the App is not usable.
We want to constantly improve your user experience and inform you that new features will be available over the time in RIS. You will be informed when such developments occur.
Connection to RIS for an external Biz User

1. Once your LONGINES contact created your account and profile you should receive this following "Account Activation" email.
If you did not received any email, do not forget to check your e-mail spam box!
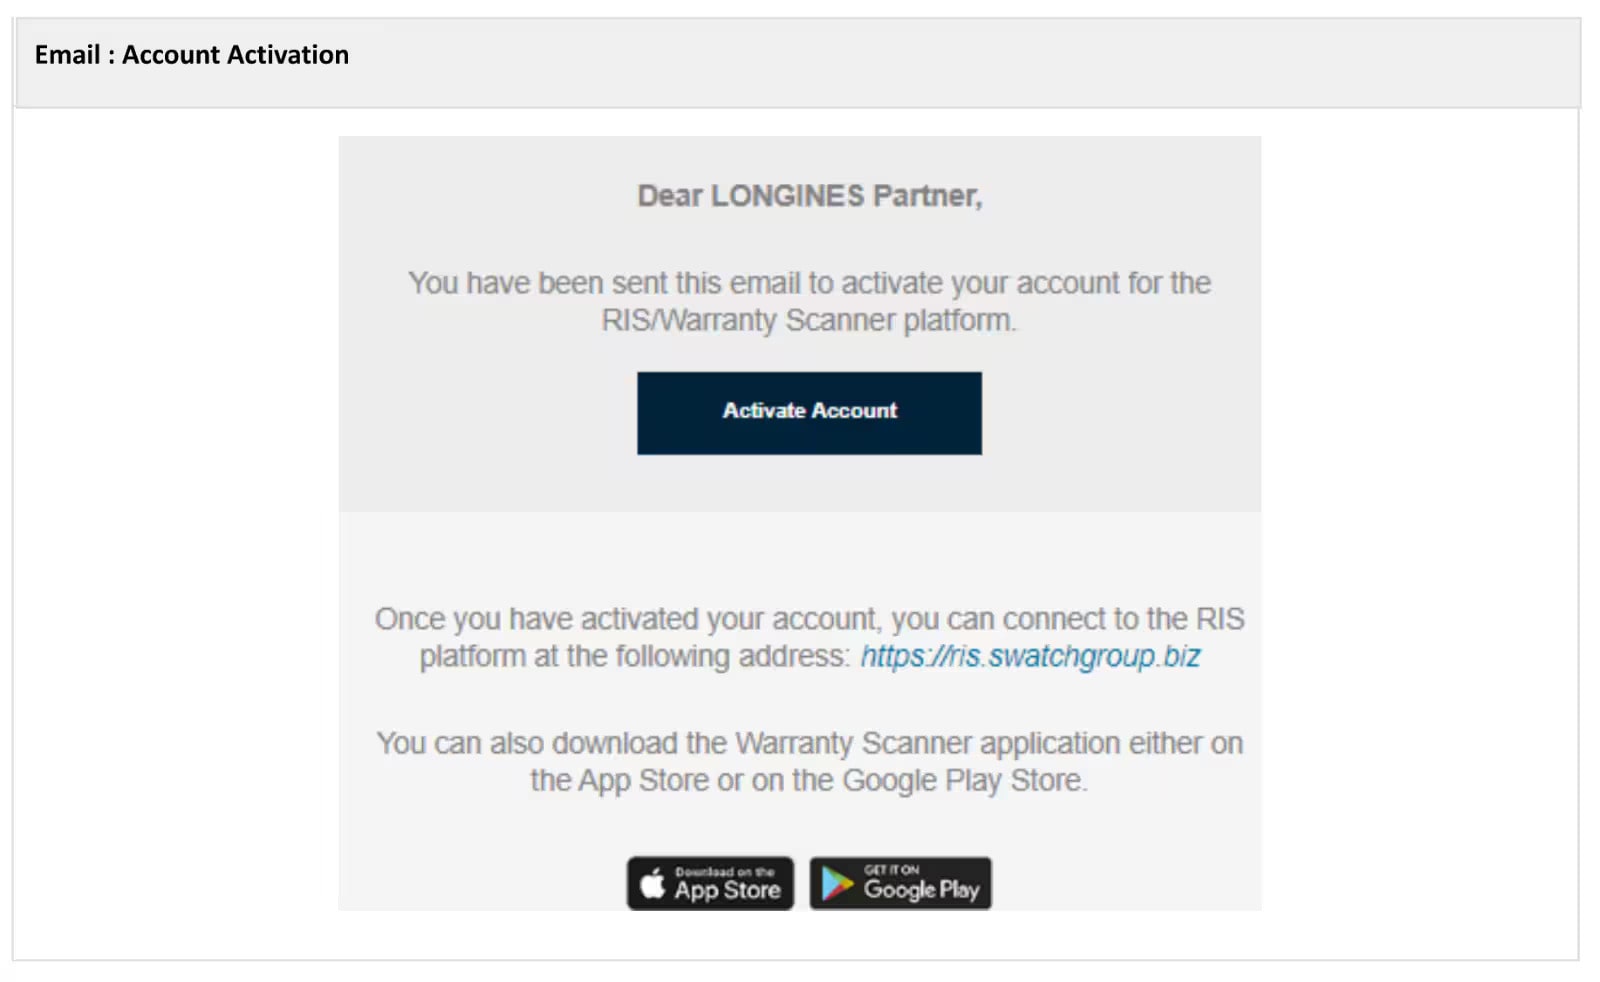
2. Click on the "Activate Account" button, and set your password
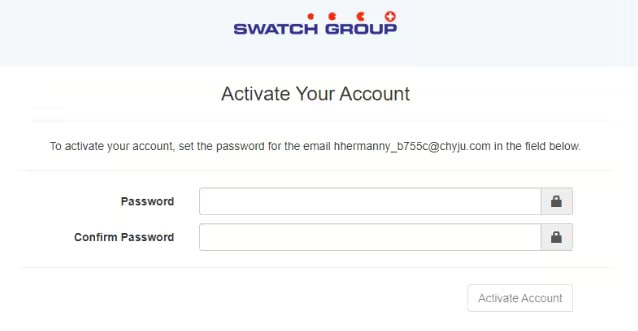
3. Having activated your account, you will receive this following email.

4. Go to RIS: https://ris.swatchgroup.biz

5. Select: Customer (.biz)
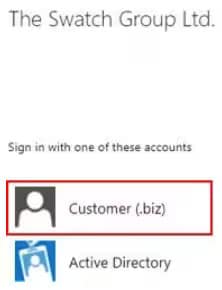
6. Sign in
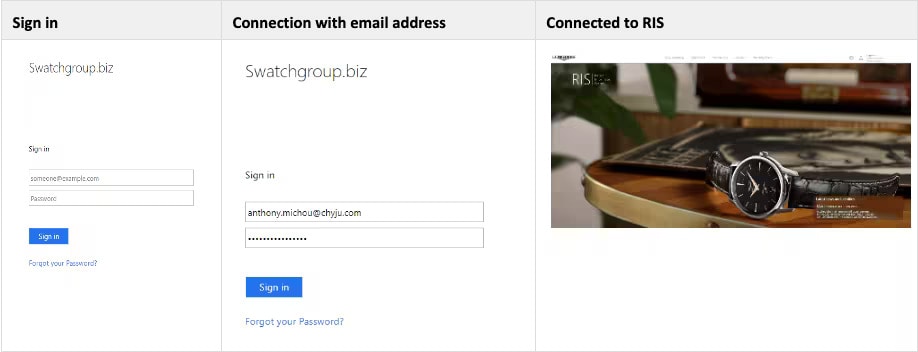
7. Pair your smartphone or tablet with your store QR Code
7.1. Download the LONGINES Warranty App

7.2. Launch the LONGINES Warranty App & pair it with your store
Support
If you forgot your password, click on "Forgot your password?" button.
1. "Forgot your password?" click on the button
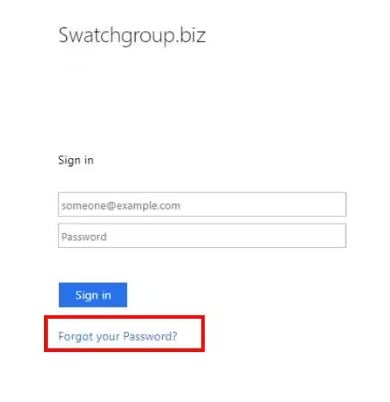
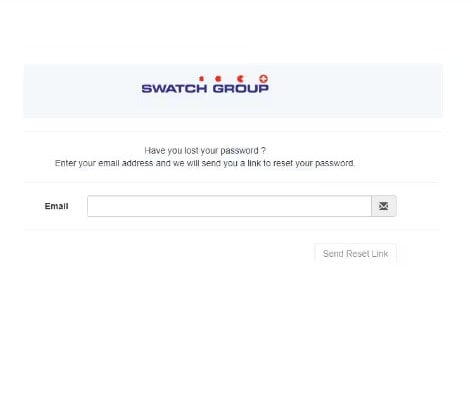
2. Fill in the account email address and click "Send Reset Link"
3. Email: Reset Password
If you did not received an email, check your spam box.
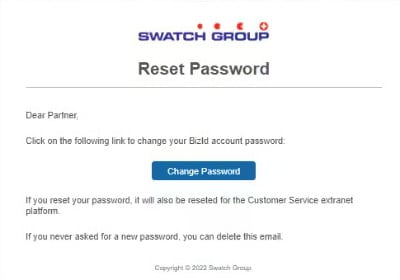
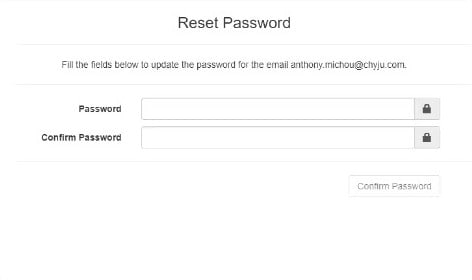
4. Modify the password
